The Battle of Muizenberg was a British military action in 1795 that led to the capture of the Dutch Colony at the Cape of Good Hope. Although it is usually referred to as a single battle, it was a series of skirmishes, manoeuvres, retreats, and stand-offs that happened over several weeks along the False Bay coastline and also inland towards Wynberg.
Despite limited fighting and relatively few casualties, the outcome had long-term consequences. Control of the Cape shifted from the Dutch East India Company (VOC) to Britain, drawing the Cape into the wider conflict between Britain and Revolutionary France and reshaping South Africa’s political future.
The strategic importance of the Cape
By the late eighteenth century, the Cape of Good Hope was the only reliable refreshment station for European ships travelling to the East Indies. Vessels bound for India and the Far East depended on the Cape for fresh water, food, medical care, and repairs. While the colony was economically modest, its strategic value was huge.
The Cape colony was founded in 1652 by the Dutch East India Company for precisely this reason. When political upheaval spread across Europe during the French Revolutionary Wars, control of this sea route became vital for Britain.
In 1794, French forces invaded the Netherlands, transforming it into the Batavian Republic, aligned with France. The Dutch ruler, Prince William of Orange, fled to Britain. British leaders feared that French influence over the Cape would threaten their access to India. As a result, plans were accelerated to secure the Cape before French forces could do so.
British strategic thinking had already identified the Cape’s main weakness. Cape Town was well defended from the sea by Table Bay and mountain-backed batteries, but False Bay and Simon’s Town were poorly protected. Landing troops there and advancing overland offered the most practical route to occupation.
In April 1795, a British fleet under Vice-Admiral Sir George Elphinstone sailed for the Cape. The fleet arrived in Simon’s Bay in June. Attempts were made to negotiate with the Dutch authorities, led by Governor Abraham Josias Sluysken, to place the Cape under British protection. These negotiations failed.
In July 1795, British forces began landing at Simon’s Town without serious resistance. Approximately 1 400 British soldiers and sailors were assembled for an advance northwards along the coast.
The Muizenberg Pass
The key defensive position lay at Muizenberg Pass, a narrow strip between steep mountain slopes and the rocky shoreline. Any force marching from Simon’s Town towards Cape Town had to pass through this bottleneck.
The Dutch hurriedly fortified the area. A rough fort and artillery position were constructed near today’s Main Road, with additional defensive works climbing the mountain slopes. The position was strong on land but exposed to naval fire from the sea.
Dutch forces in the area included regular soldiers, burgher militia, artillerymen, and the Pandour Corps, a locally raised unit made up largely of Khoi and people of mixed descent, many of whom were experienced marksmen.
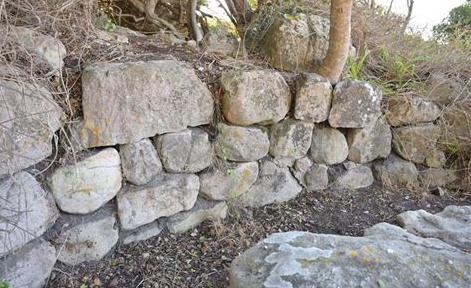
Today, beside the Main Road in Muizenberg, you can see a simple rock fort originally started by the Dutch in 1795 and later expanded by the British from 1796 onwards. Higher up the mountainside, just below Boyes Drive, is a roughly built defensive wall in front of a trench (parapet), likely constructed by the Dutch. The old fort’s location is fairly hidden, and many people, even locals, are unaware of its existence.
The fighting at Muizenberg
On 7 August 1795, British forces moved. Infantry and sailors marched north from Simon’s Town through Fish Hoek and Kalk Bay towards Muizenberg. At the same time, four Royal Navy ships — HMS America, Stately, Rattlesnake, and Echo — sailed parallel to the shore.
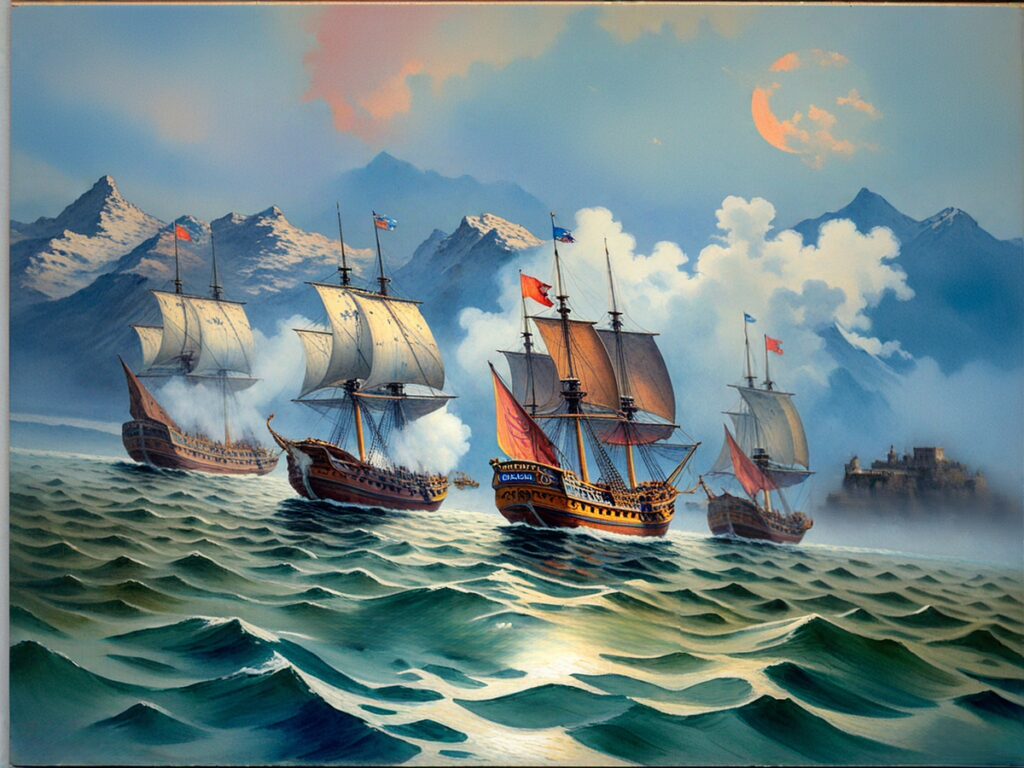 HMS America, HMS Stately, HMS Rattlesnake and HMS Echo at the Battle of Muizenberg
At Kalk Bay, a small Dutch gun position was abandoned after a brief exchange. The Dutch forces withdrew to the main fort at Muizenberg, where around 800 defenders were positioned with several cannons aimed down the coastal road.
When the British ships anchored offshore, they opened fire with broadsides. The Dutch position, though well placed against a land assault, could not respond effectively to naval bombardment. After about half an hour of sustained fire, the defenders abandoned the fort and retreated inland towards Zandvlei and the area now known as Retreat.
This withdrawal opened the pass and allowed British troops to occupy Muizenberg.
Stalemate
The capture of Muizenberg did not end the campaign. Over the following weeks, Dutch and British forces skirmished along the line from Zandvlei to Steenberg and Wynberg Hill.
Local burgher forces and Pandours conducted several attacks and counterattacks, at times successfully harassing British positions and capturing prisoners. Some engagements took place in difficult terrain around wetlands and mountain slopes.
Despite these efforts, the Dutch command was uncertain and fragmented. Defensive decisions were delayed, communication was poor, and leadership disputes undermined coordination. British naval support continued to give the attackers a decisive advantage.
By early September, both sides had reached a stalemate near Wynberg Hill.
Reinforcements and surrender
The situation changed in September 1795 when substantial British reinforcements arrived by sea. With a much larger force now assembled and Cape Town directly threatened, Dutch resistance became untenable.
On 14 September, British forces advanced again. Two days later, on 16 September 1795, Governor Sluysken formally surrendered the Cape Colony to the British outside the Castle of Good Hope. The occupation was secured with minimal further fighting.
Almost a year later, a Dutch reinforcement fleet reached the Cape, only to discover that the British garrison was far stronger. The Dutch forces surrendered without a battle.
The Battle of Muizenberg formed part of the wider struggle between Britain and France during the French Revolutionary Wars. Control of overseas colonies and sea routes was as important as battles in Europe.
Under the Treaty of Amiens in 1802, the Cape was briefly returned to the Batavian Republic. However, peace was short-lived. When war resumed, Britain invaded again in 1806, defeating Dutch forces at the Battle of Blaauwberg. From that point, the Cape remained under British control until it became part of the Union of South Africa in 1910.
Leadership and internal tensions
The defence of the Cape was weakened by divided loyalties among senior Dutch officials. Some leaders hoped Britain was acting on behalf of the House of Orange rather than pursuing permanent occupation. This uncertainty contributed to hesitation and poor decision-making at critical moments.
Disputes between senior officers and military engineers further complicated the defence. While some local forces fought effectively in skirmishes, the overall strategy lacked coherence.
The Pandour Corps
The Pandour Corps played a notable role during the campaign. Raised in 1793, the unit consisted mainly of Khoi and people of mixed descent, many with experience handling firearms through farm work and frontier commandos.
Pandours were used as mountain pickets and skirmishers and were involved in several engagements near Simon’s Town, Fish Hoek, Zandvleii, and Steenberg. Contemporary accounts often described them as effective fighters when properly led.
Despite their efforts, dissatisfaction grew over pay, rations, and treatment. Internal unrest weakened their effectiveness in the later stages of the campaign. After the British occupation, the Pandours were disbanded, but their service influenced the later formation of the British-controlled Cape Corps.
What remains today
Physical traces of the battle can still be seen in Muizenberg. Along Main Road are the remains of stone fortifications built on the site of the original Dutch works and later strengthened by the British. Higher up the mountainside below Boyes Drive are rough defensive lines and parapets dating from the same period.
Occasional discoveries of cannonballs during construction work in the area reinforce the historical record of naval bombardment. These remains mark the epicentre of a conflict that, while limited in scale, altered the course of the Cape’s history.
Two restored cannons sit at the entrance to Muizenberg Park. The Dutch likely used the two 24-pounder cast-iron guns. They were cast in Sweden in 1782. The cannon could hurl a 10 kg cannonball up to 5 kilometres.(see main image)
Why the Battle of Muizenberg matters
The Battle of Muizenberg was less a dramatic battlefield clash than a decisive strategic manoeuvre. It demonstrated the importance of naval power, geography, and logistics in eighteenth-century warfare.
More importantly, it marked the moment when the Cape became firmly embedded in global imperial rivalry. The consequences shaped governance, language, trade, and political development in southern Africa for more than a century.
- Colourdots is an independent regional information resource for the Western Cape.
Learn more about the project HERE